Updates of progress will normally be posted each Monday:=========================================================================== June 20, 2005
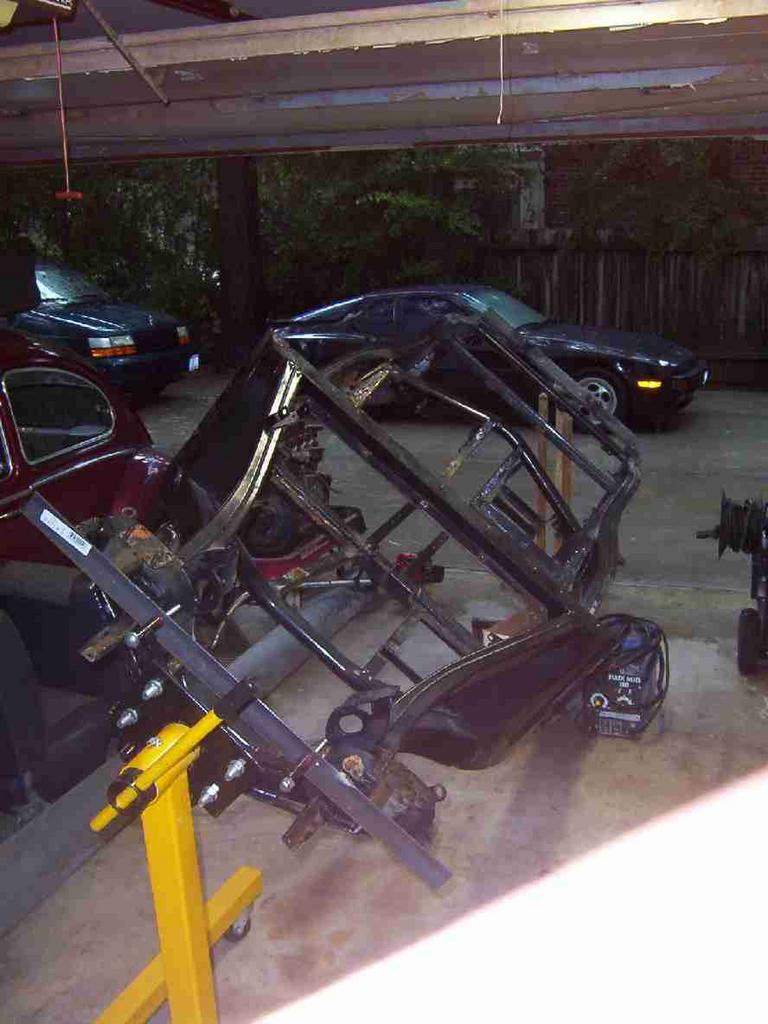
===========================================================================In June of this year I finally got around to starting on the 1959 MGA, and "unpacked" the car parts to a new set of shelves in the garage. I made a lifting fixture out of a couple of 2x6's and curved plywood pieces to lift the body tub off the frame, and picked it up with my engine hoist. This was a very easy, one man operation. In doing that, though, I discovered that the sills are virtually nonexistent, being a hodgepodge of brazed and pop-riveted sheet metal pieces - more on that later. It's kind of a wonder that the body tub hung together. Anyway, the tub is resting comfortably up high on new sawhorses in one bay of the 3-car garage, and the chassis can roll underneath.
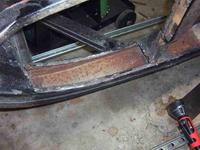
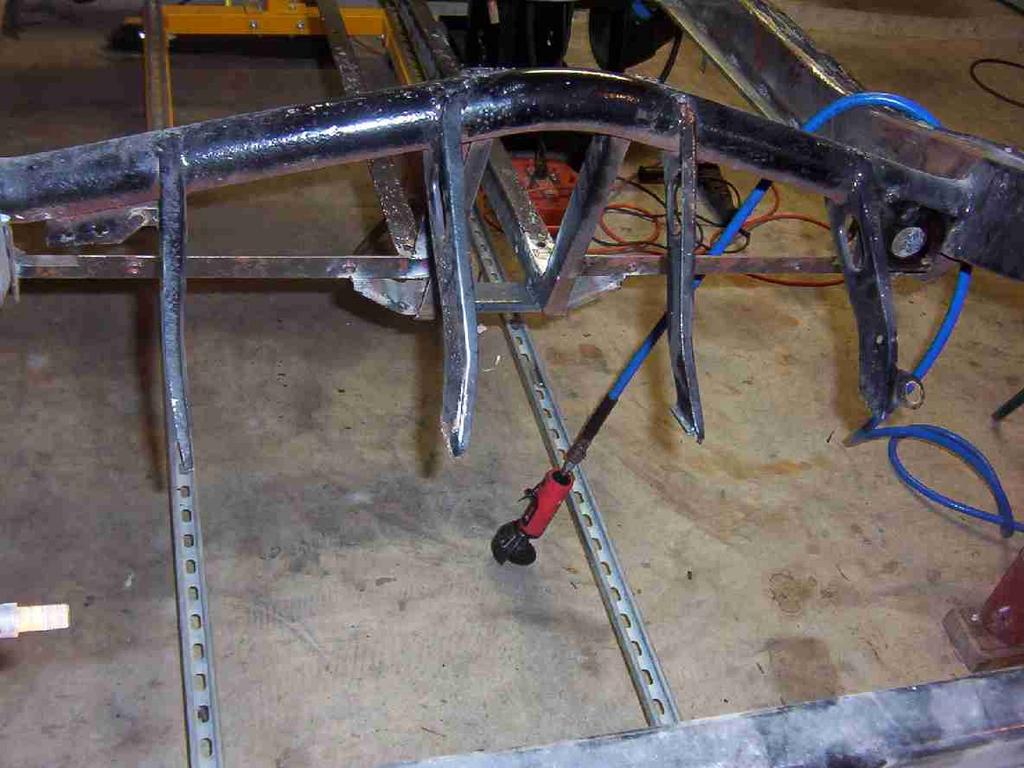
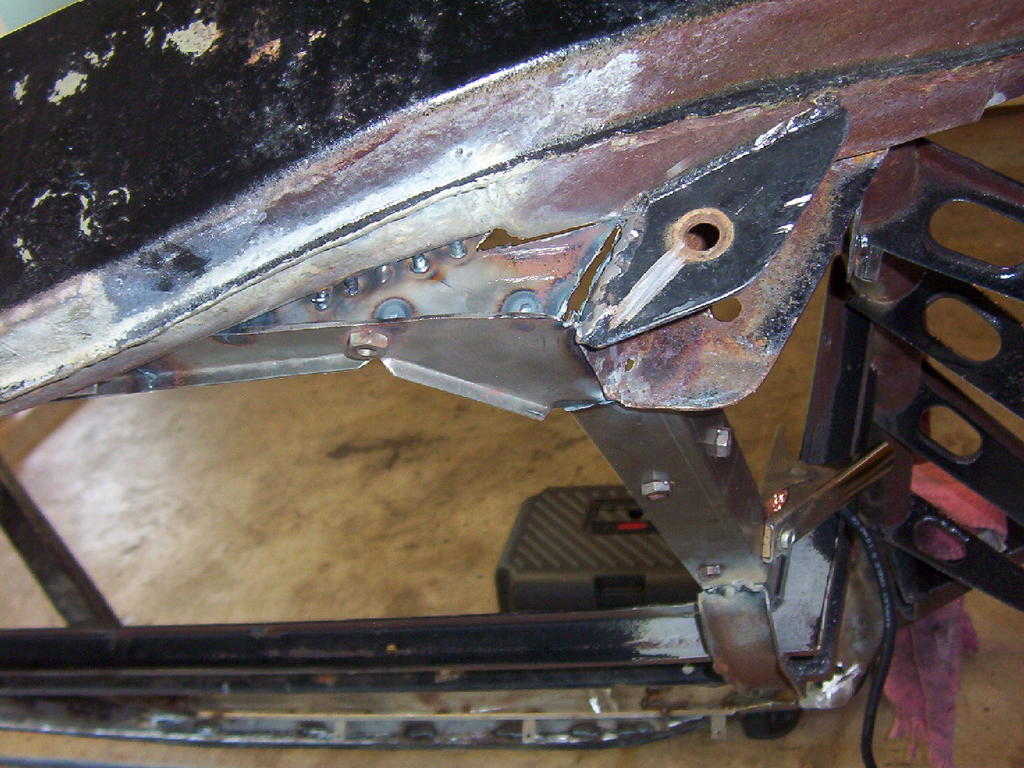
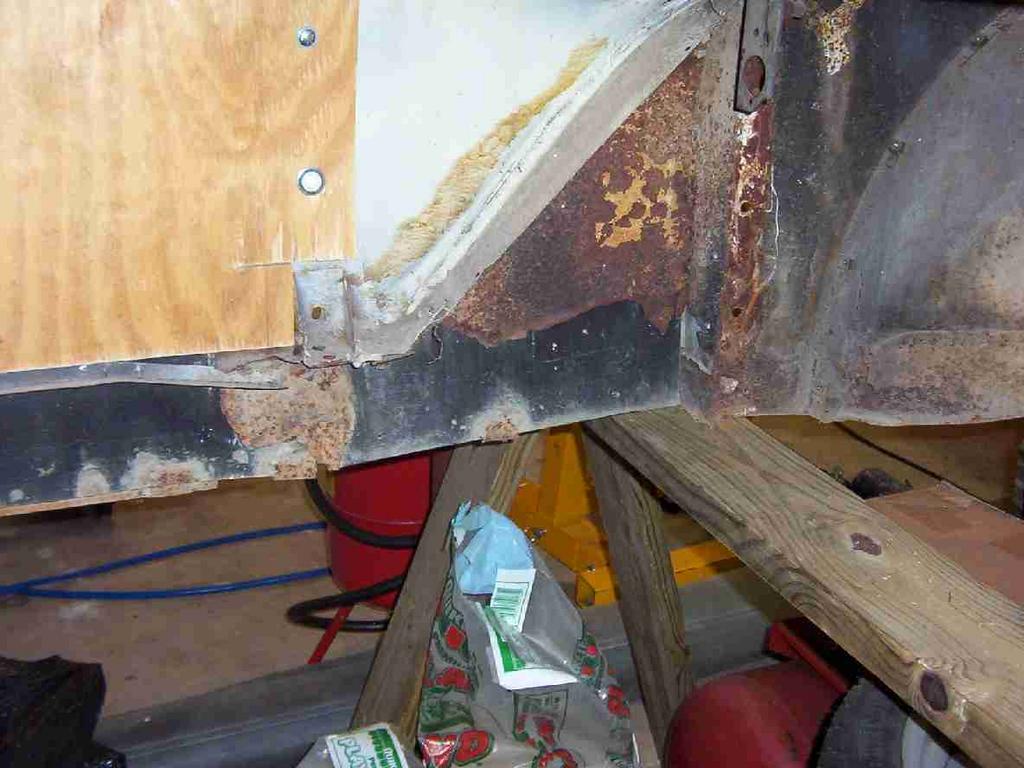
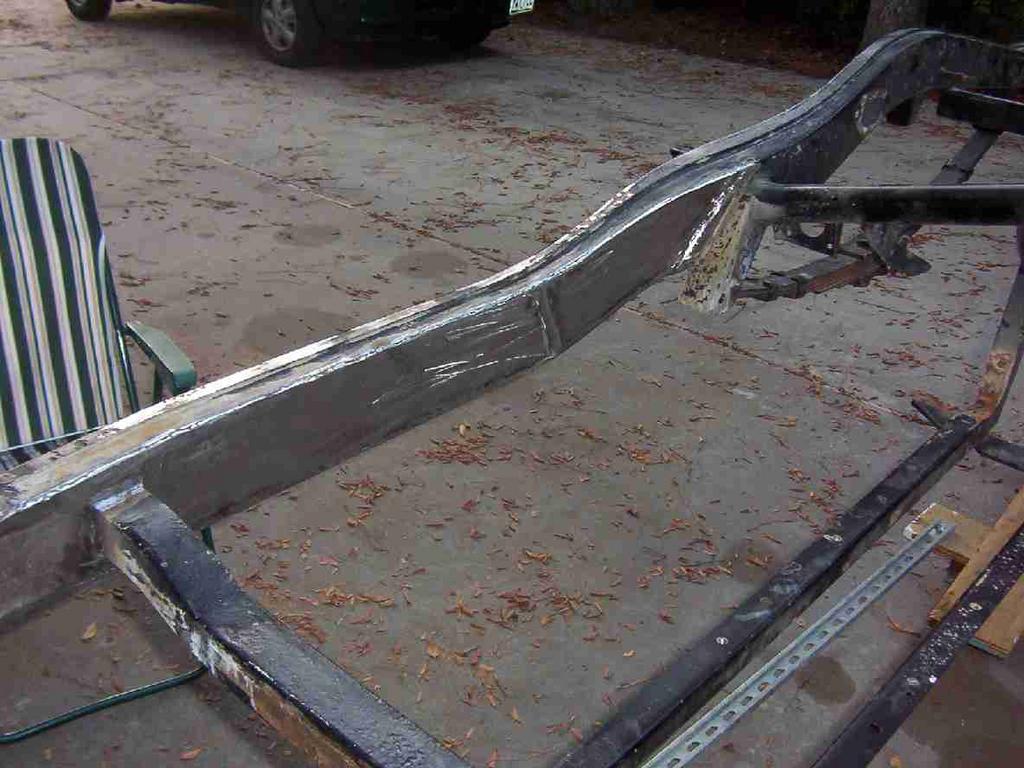
 This picture shows some of the "angle iron" that the previous owner (or his henchman)had welded to the inside of the frame to replace the rusted-away floorboard rails. The vertical piece you are looking at here is 1/4" x 4" flat bar, about 30 inches long. It is welded only along the top edge. The horizontal "rail" piece is 1/8" flat bar. I cut all of this stuff out using a combination of sawzall, 4" electric grinder, and an air cut-off tool.
 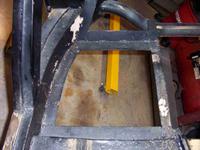 This picture of the driver's footwell area shows more of the 1/8" flat bar and the BAD welding. No attempt was made to repair the underlying rust damage; this was just welded on to the remaining sound metal - I guess the person who did it either didn't have access to the correct replacement pieces or just figured it would never be seen.
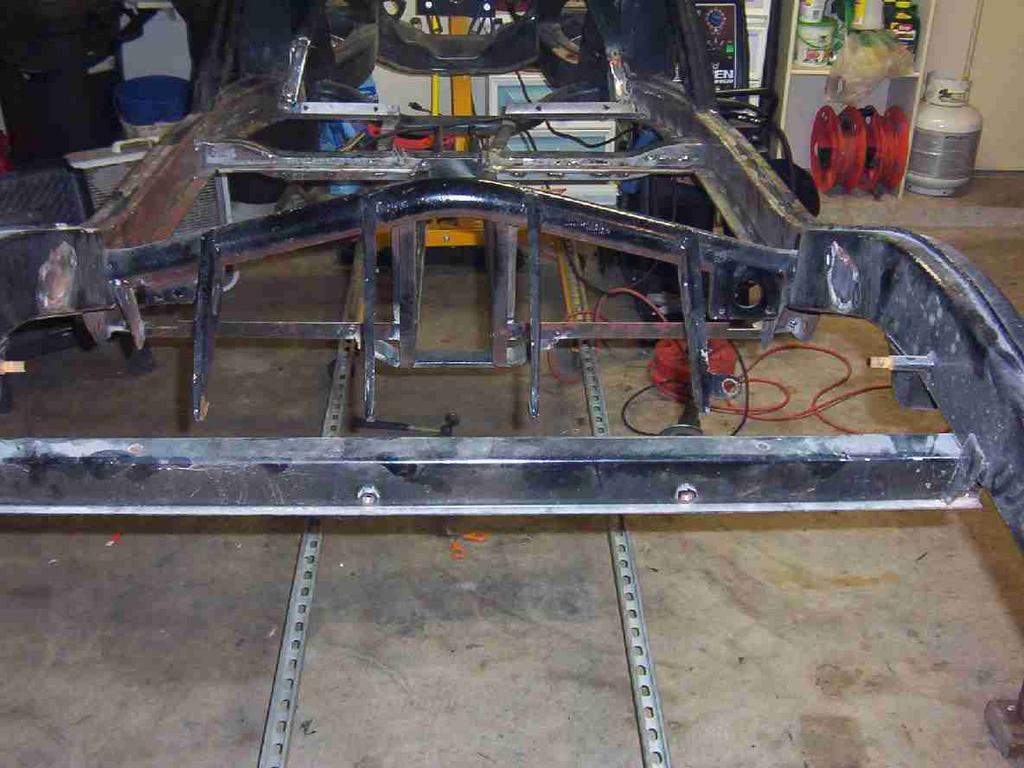
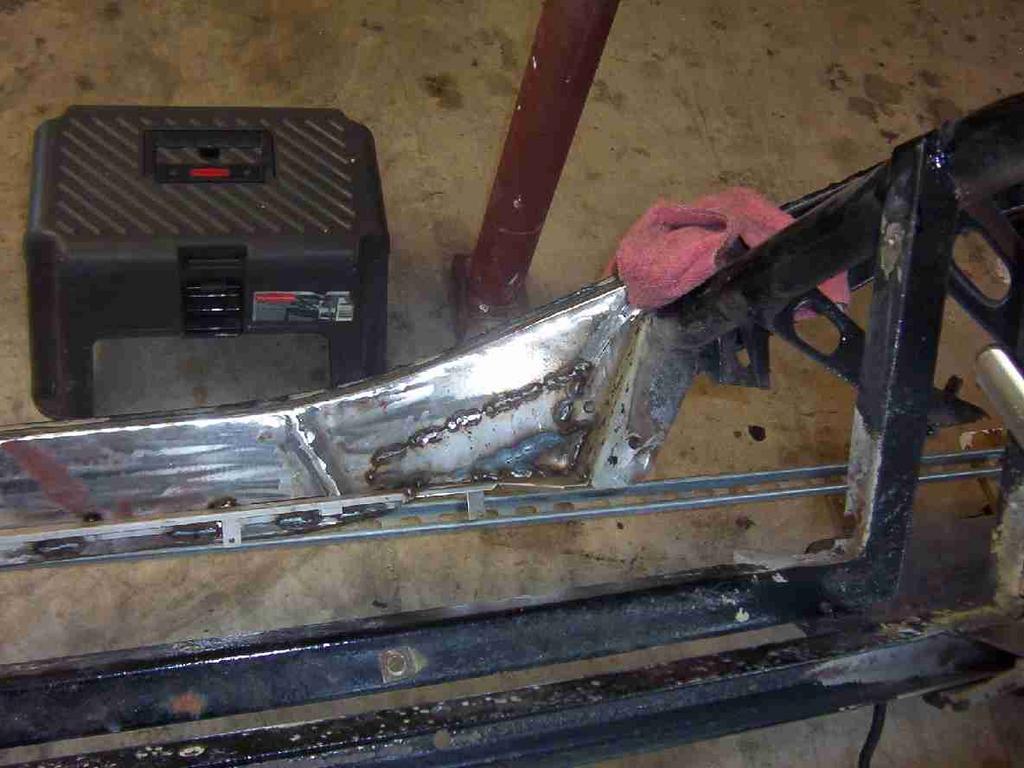
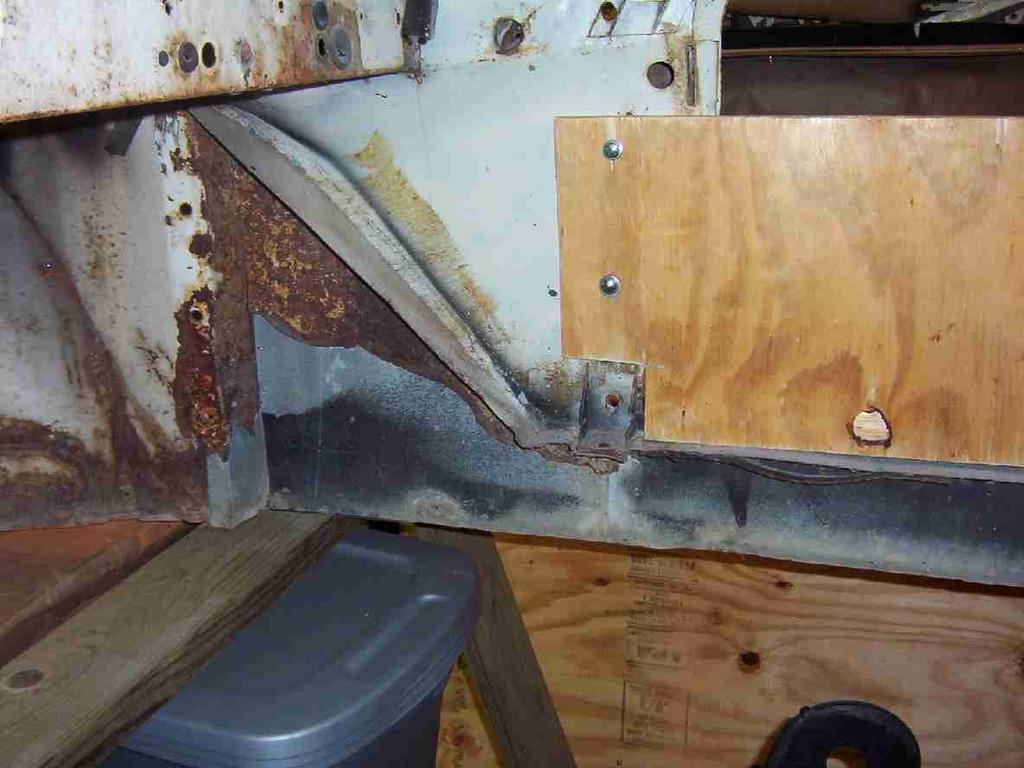
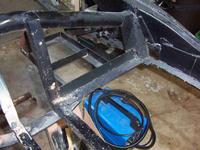 This last picture shows the construction at the rear of the driver's side at the battery box area. All of the incorrect pieces were cut out, including the battery boxes, which I will refabricate.
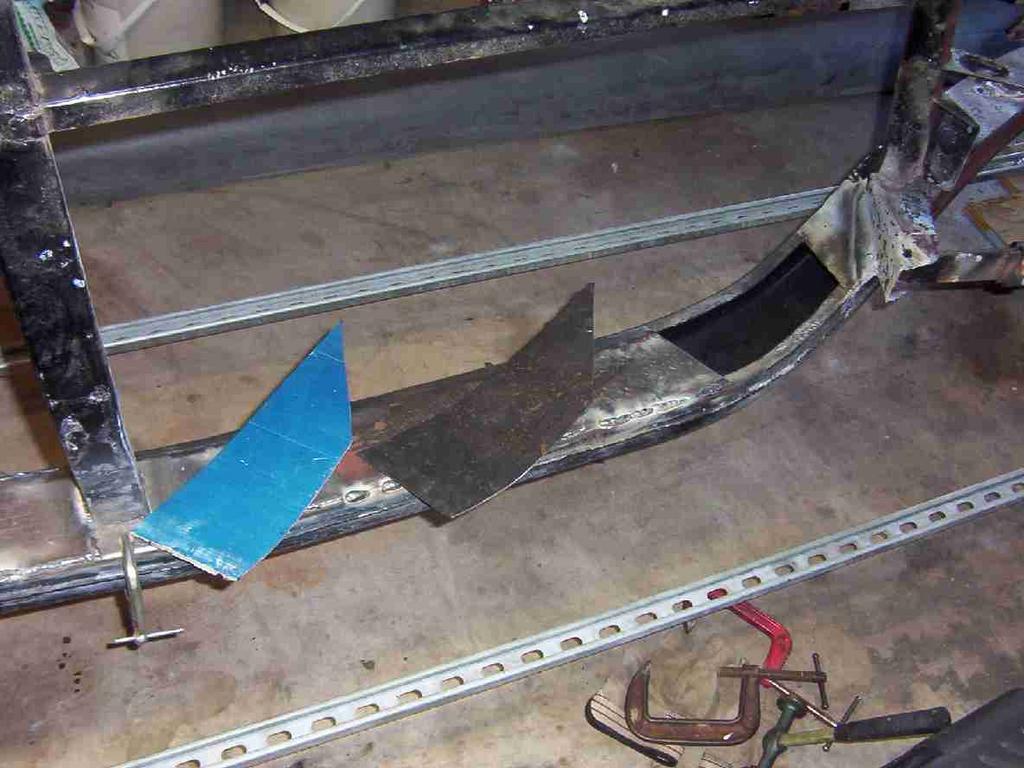
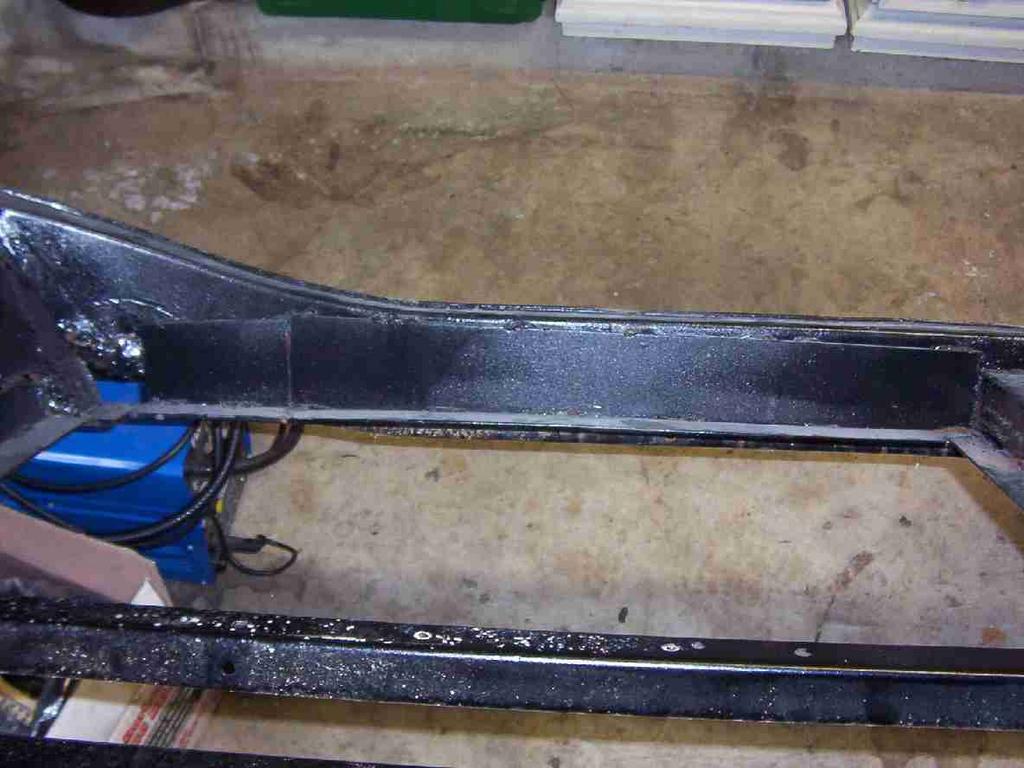
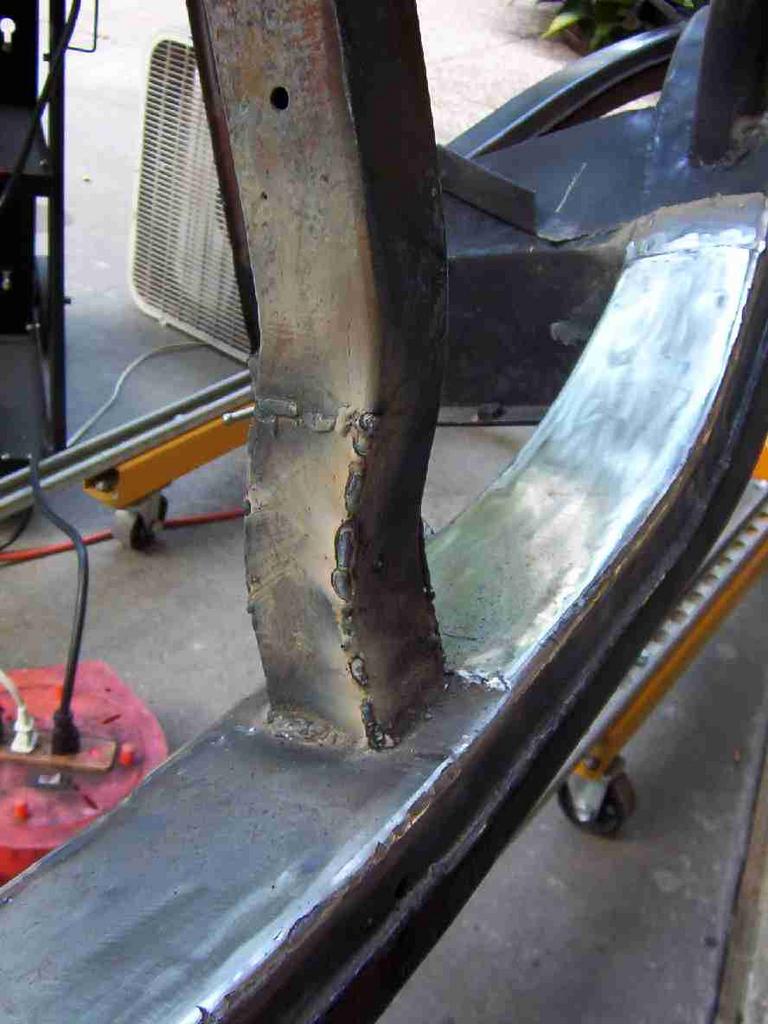
 This is a picture of the frame showing one of the bad spots "repaired" by the PO. This one shows the frame right below the goal post - there is a break there and the inside of the frame has been bondo'ed - I guess just to make a bad repair look better (?!)
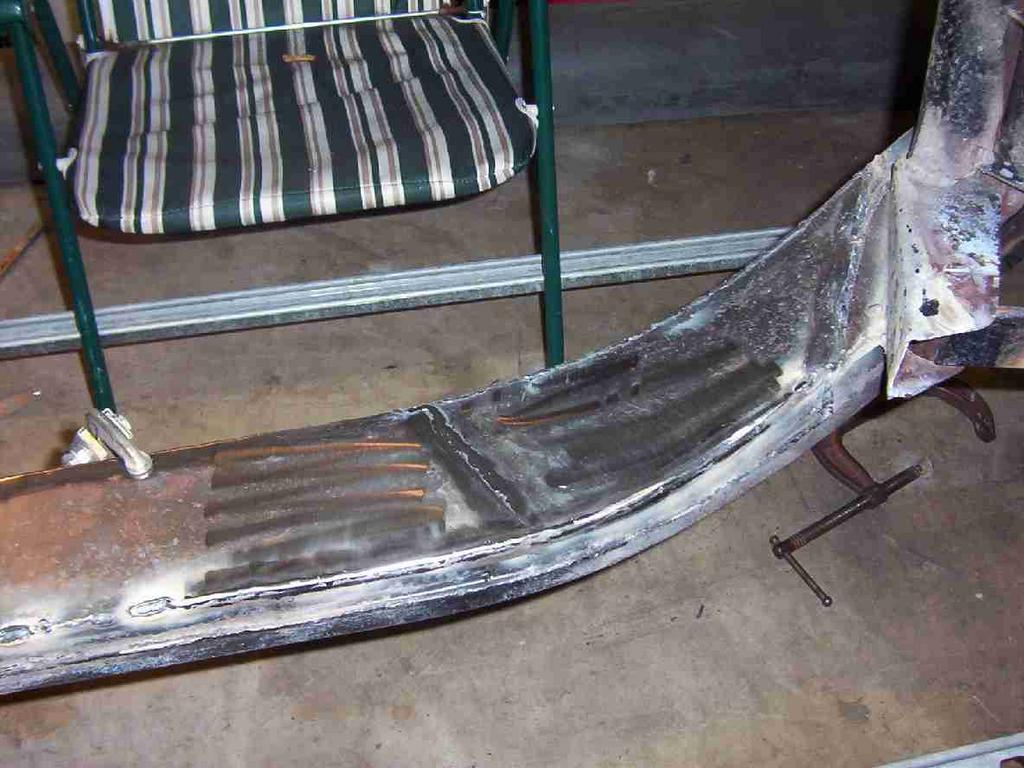
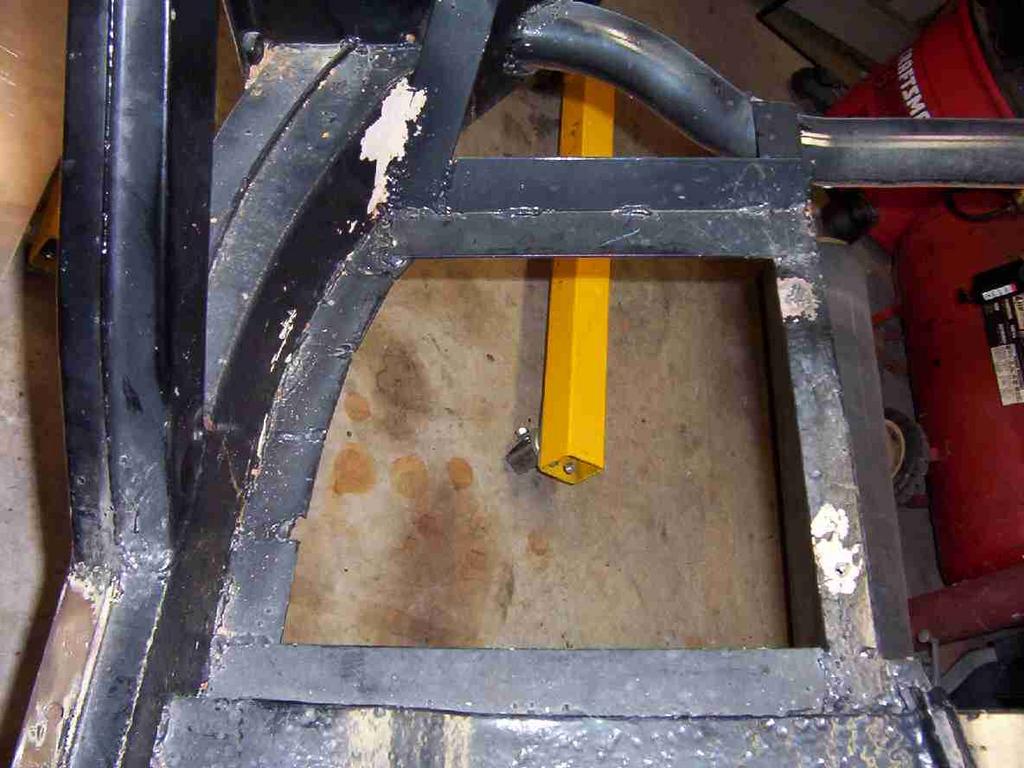
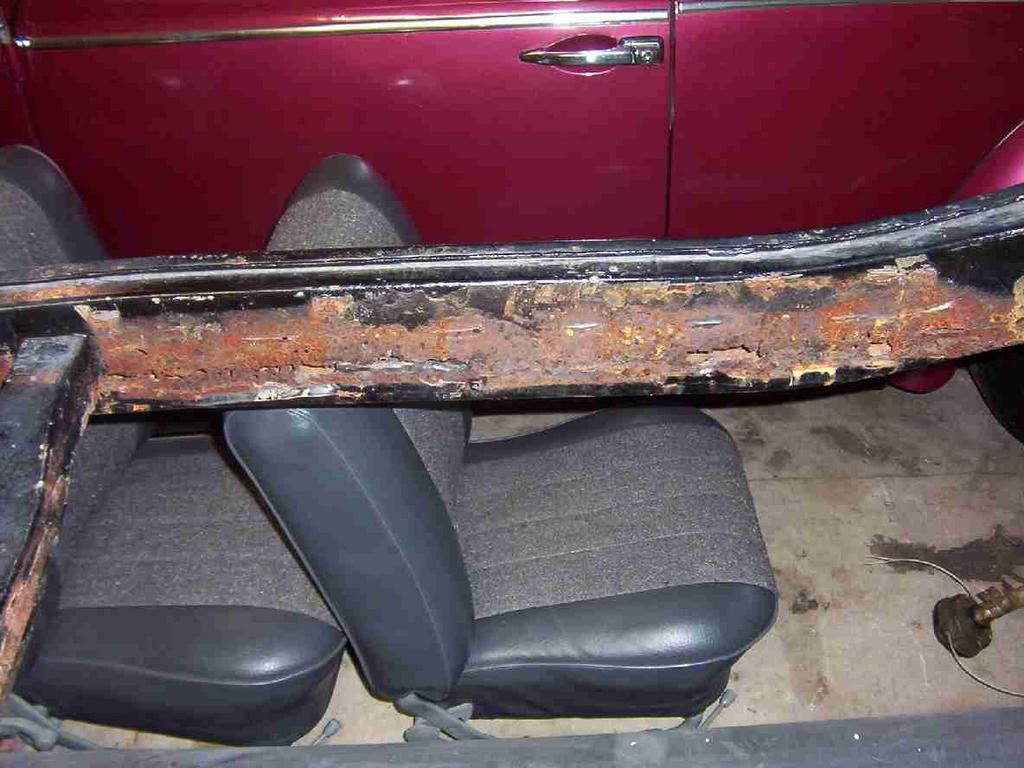
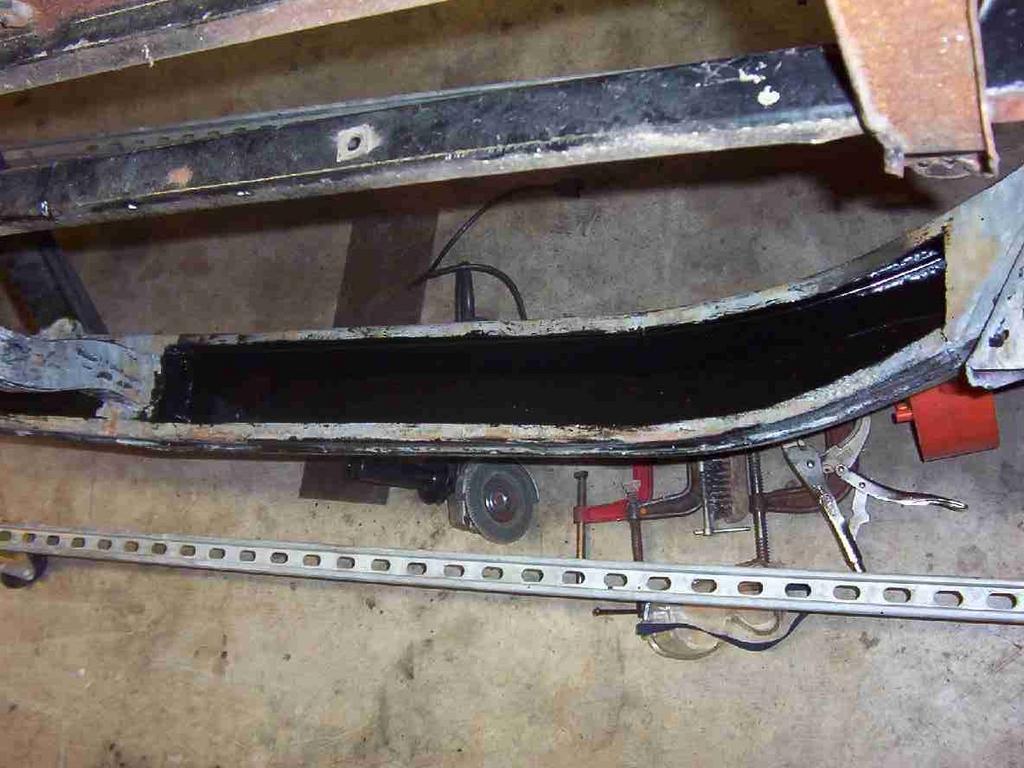
  This picture, which was taken later with the frame mounted on the rotisserie, shows the typical MGA frame rail rust that was covered up by the 1/4" flat bar. Below the frame are the seats from my '66 VW Bug which I had removed to do some work. They are now back in the car which is covered to protect it from the frame rehab work.
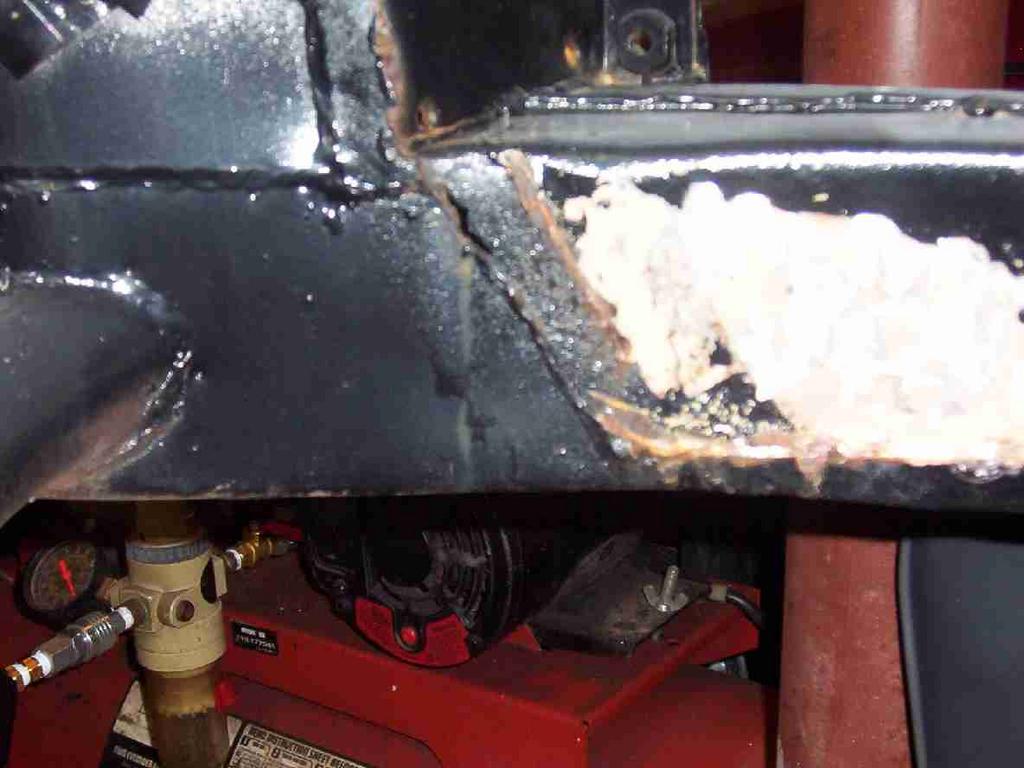
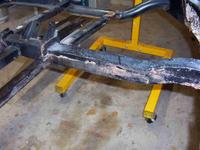 This shows some of the rust in the square tube crossmember. I think I actually made some of these holes getting the angle iron off - I was a little agressive, but it was about 96 in the shade in Houston at that time!
===========================================================================
July 4, 2005
===========================================================================
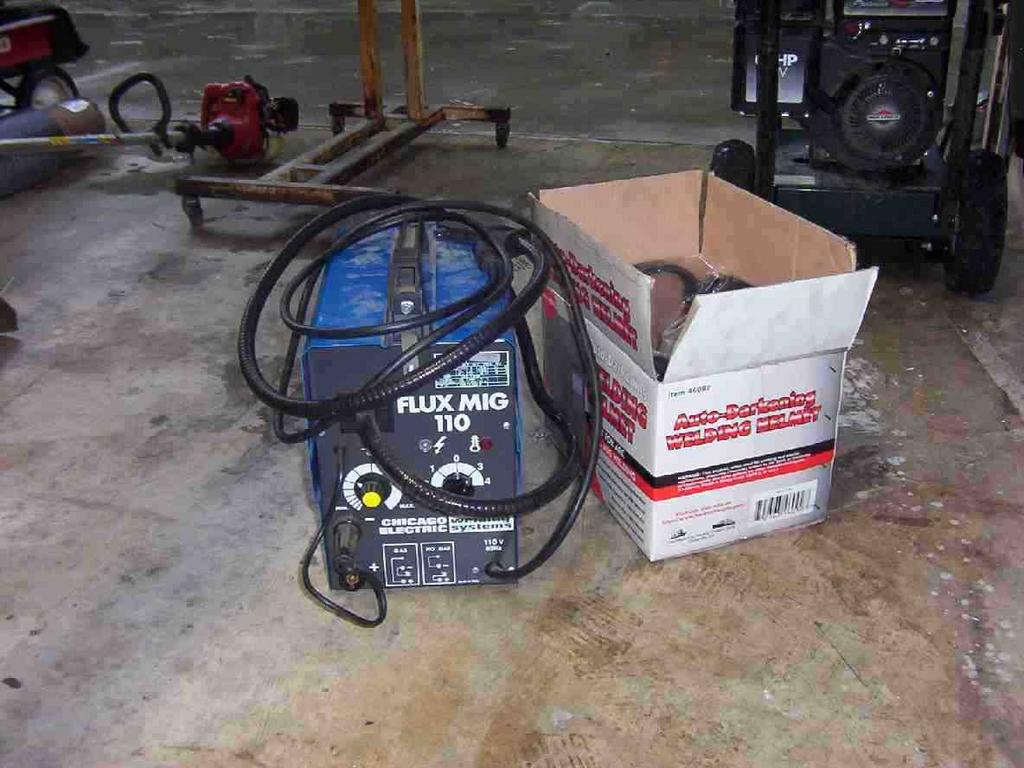
 Here is the mig I borrowed from my good friend, Uri Nooteboom, to try out. When the PO was pop-riveting some of his sill work together, he drilled several 1/8" holes through the outer frame, so I spent a few minutes closing the holes up with the mig and grinding them flush. The auto-darkening helmet was great - especially compared to my 20+ year old Craftsman arc welding helmet (which has since been thrown out!)
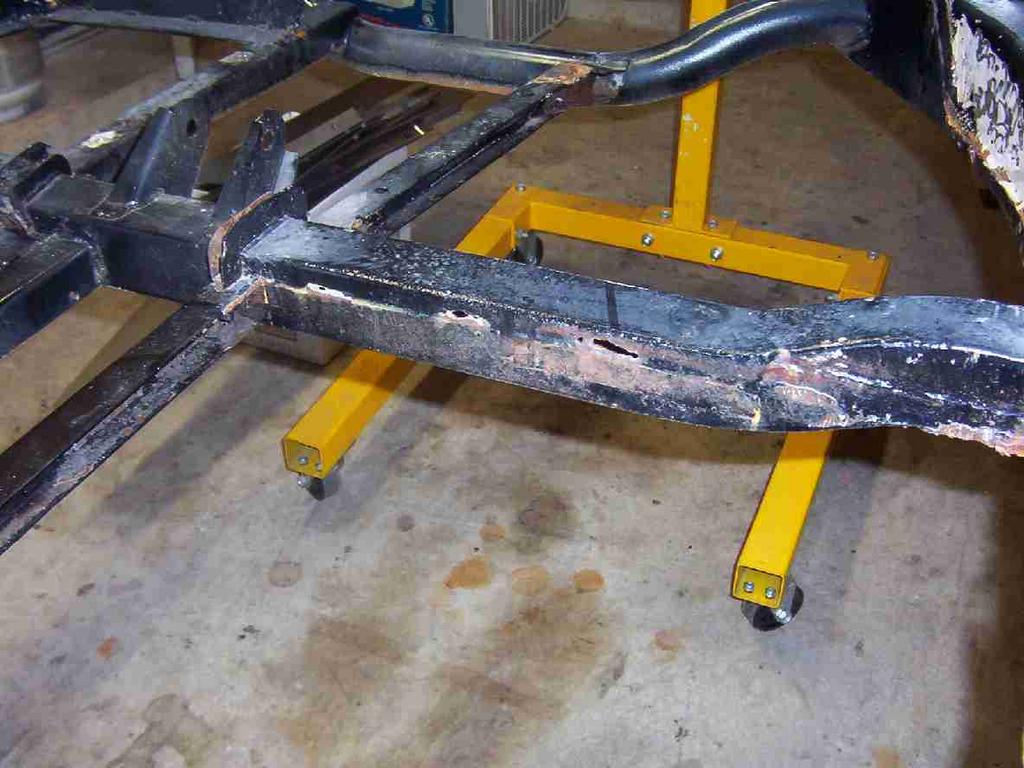
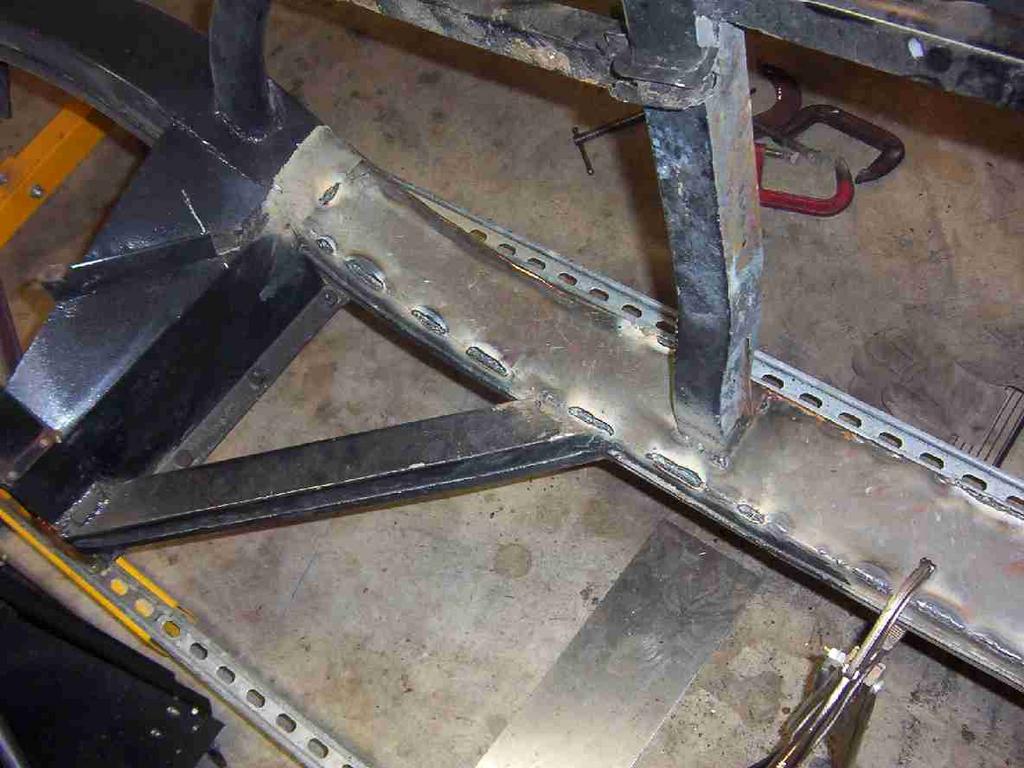
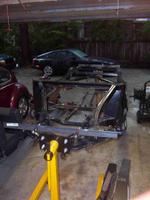 I really wanted to have a rotisserie to work on this project, and it will make welding, sandblasting, and painting much easier. This is a view of my frame rotisserie. It is basically two engine stands, each bolted to an end of the frame with a simple angle iron attachment. One of the stands is for a VW engine, so has an unusual attachment for hanging the VW engine, but it works ok to hold the frame. The frame is pretty light - probably not over 200 lbs or so. In the background you can see my '88 Porsche 944 work car and my '66 VW Beetle, along with the family van.
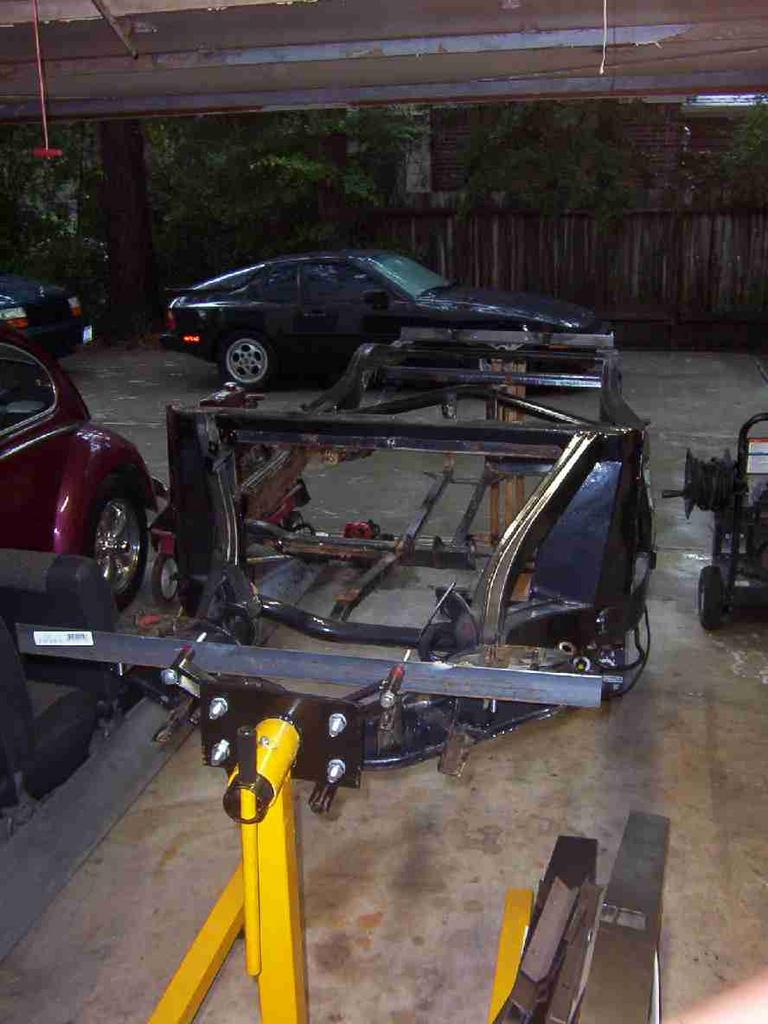
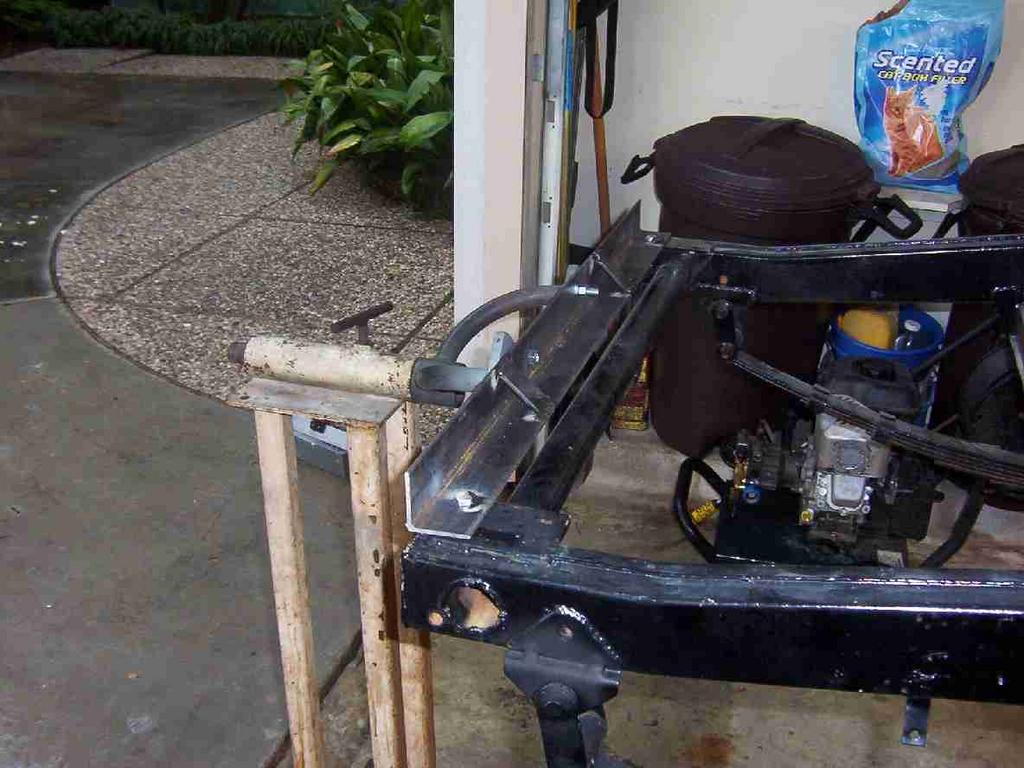
 Here is another view of the rotisserie with the frame tilted. I don't know why the picture is cut off - guess I should have cropped it!
 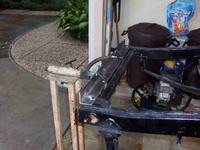 Here is the end with the VW engine stand.
===========================================================================
July 11, 2005
===========================================================================
 Received my replacement metal for the frame and seat rails from Clark Spares & Restorations. Also bought a 3-pt seatbelt mounting kit from him.
===========================================================================
July 18, 2005
===========================================================================
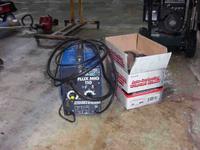
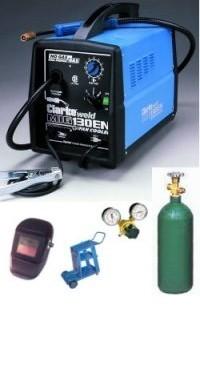
 Here is the mig welder package that I bought through the web from Welding Depot consisting of a Clarke 130 amp welder, auto-darkening helmet, rolling mig cart, gas bottle, and gas regulator. The package was about $500 which seems an excellent price given the individual costs of the various items. Delivery from Welding Depot took just a few days, and I didn't realize the welder was here until I just happened to open the garage door in the third bay, and saw the boxes sitting there. The UPS guy just stuck them in the garage without leaving any notice. Clarke welders are made in Italy I believe. This one has 4 heat settings, continuously adustable wire feed rate, and is fan cooled. So far, I have not had any problem overheating the welder, and I weld in 95+ degree weather here in Houston!
===========================================================================
July 25, 2005
===========================================================================
Ordered POR15 to paint the inside of the frame rails after sandblasting and prior to welding. I have a pressure pot sandblaster, and used it on my '66 VW bug. It works pretty fast and much better than a siphon feed gun. Still, sandblasting is a tough, dirty job, especially in Houston in the summer!
===========================================================================
August 1, 2005
===========================================================================
This past week I cut out the rusty sections of the main frame rails in preparation for sandblasting and coating. Not difficult but tedious and noisy. I am sure the neighbors were peeking out the blinds to see what the heck was going on. I did as much of the work as I could in a closed garage in the evening (it's hot).
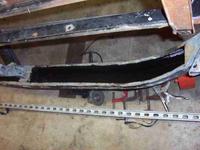
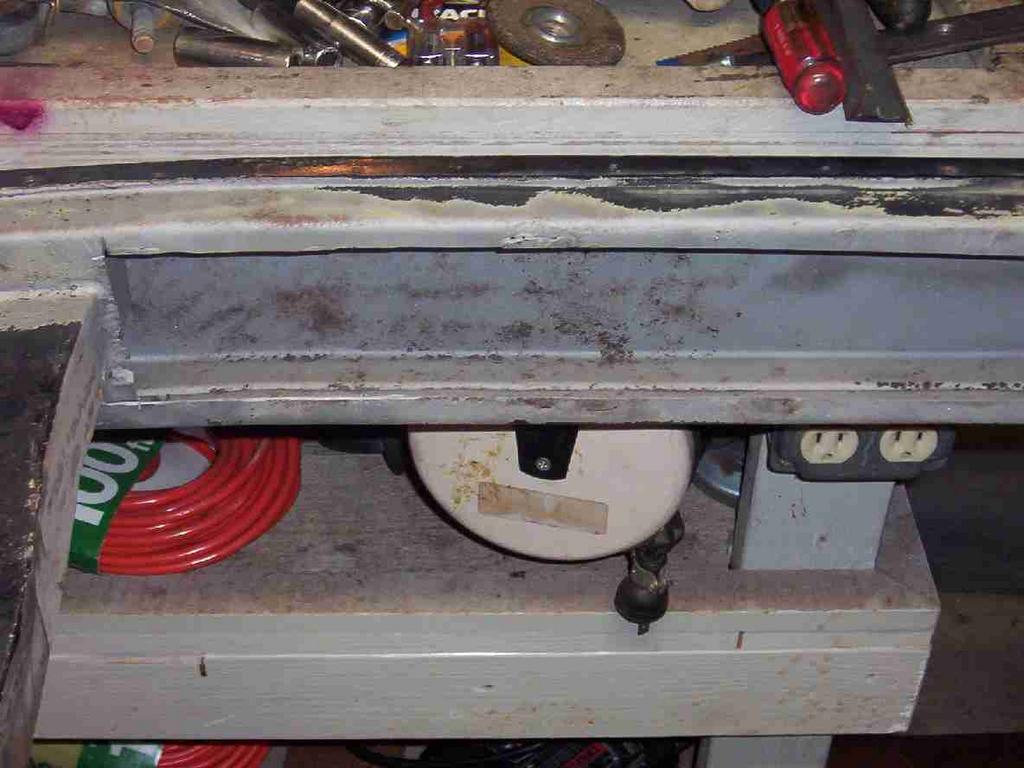
 Here is view of the right side frame rail with the rusty sections cut out. I actually did this using an air cutoff tool and a skilsaw with a metal cutting blade in it. I think it would have gone much faster with a cutting disc in my 4" angle grinder. Live and learn. Actually, the metal other than the inner wall was not badly rusted, and cleaned up fine.
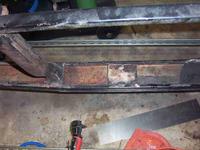 Here is the rest of that side. The square thing is a fiberglass block that served as a resonance absorber, I guess to cut down on noise. I didn't replace these as I couldn't tell from anyone else's websites that they did. Besides, I can't see how the benefits outweigh the drawbacks of absorbing and holding moisture in the frame. Hey, if the frame "drums." I can drill a hole in it and fill it up with urethane foam!
 ===========================================================================
August 8, 2005
===========================================================================
 Last week I sandblasted the insides of the frame rails in preparation for painting with POR15. My 25 year-old Craftsman 4 horse air compressor is having a hard time keeping up - maybe it's time for a new one. Hmm, let's see...$900 for a storage shed I bought to free up MGA space in the garage, $500 for the mig, say another $200 for miscellaneous tools and supplies bought so far, then another $400 or $500 for a new compressor...I'm just glad my loving wife doesn't read this blog. "What's that, Hon? No, nothing, just working on a spreadsheet for work..."
 More sandblasting. I didn't worry about getting all of this to white metal as it was going to be painted with POR15. I did make a special effort to blast the bottom seam thoroughly, though.
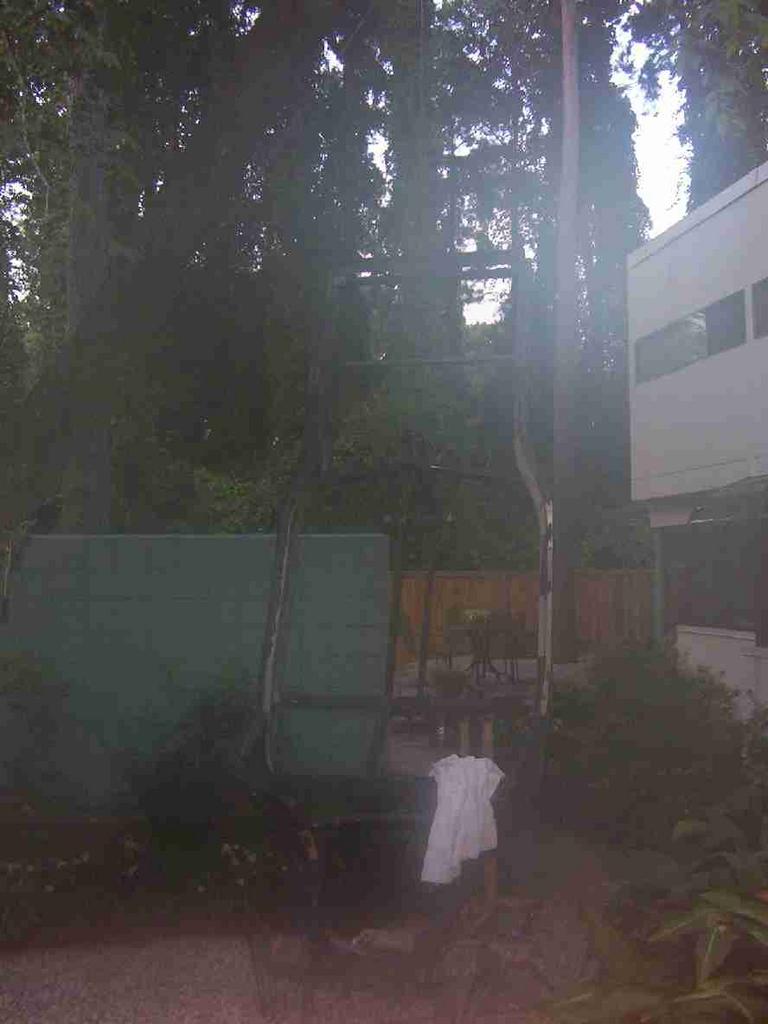
 This is car restoration humor - sorry about the poor picture. Even though I tried to prevent sand from getting into the frame end sections, I was not successful. Every time I turned the frame on the rotisserie, more sand came out. Finally, I decided to hoist the frame up in a tree, by each end in turn, to dump the sand out, and I got a cup or two, so good to go for POR15 coating.
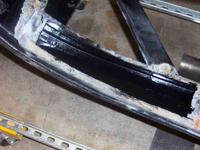
Front and rear sections of right rail coated. The POR15 instructions say once you have opened the can, dip or pour out what you need, and don't return it to the can as it will shorten the shelf life. Also, put saran wrap between the lid and the can lip or you won't be able to get the can open again. Finally, don't allow a drop (including sweat) to get in the coating or you will mess up the adhesion. I might add, "Lay down a drop cloth under the frame, Bozo, because you will drip paint on your garage through the drip holes (appropriate term) and make a mess!" Also, here's another helpful hint - when using Metal Prep, which contains phosphoric acid, make sure the mist from the sprayer doesn't happen to drift into an open scrape on your shin - WAAAUUUGGGHHH!
 This really is nice stuff though - it flows out and dries great looking. Somewhat expensive at $33/qt on the web, but a little goes a long way. Some of this will burn off around the edges with the welding, but most of it should stay on.
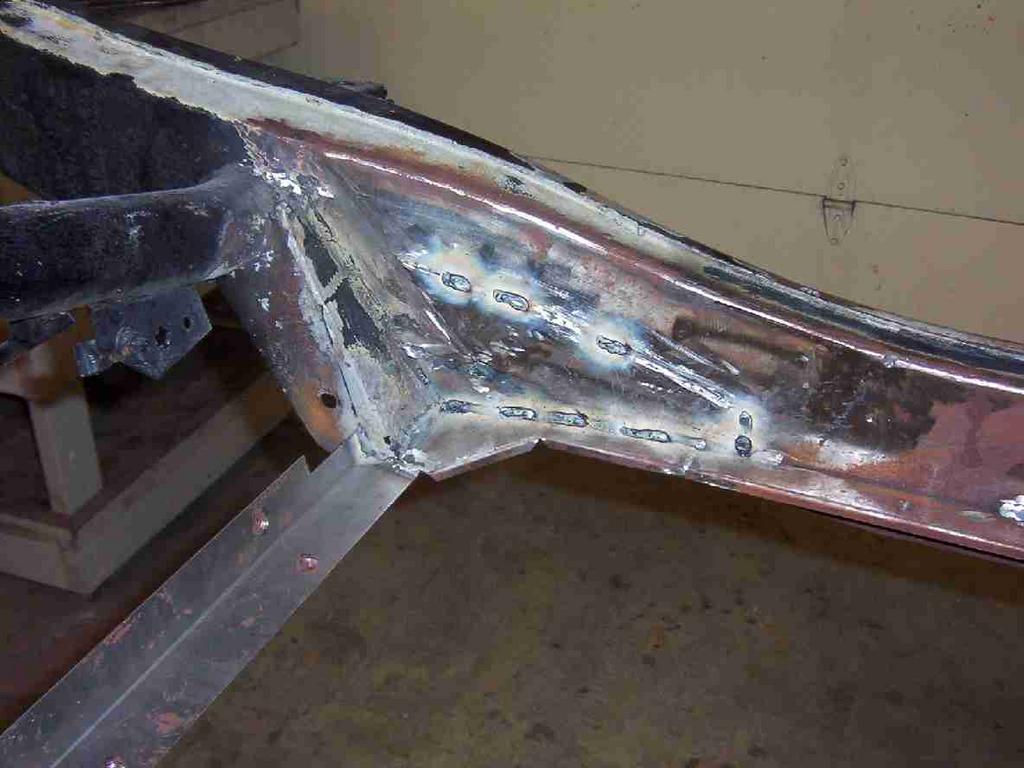
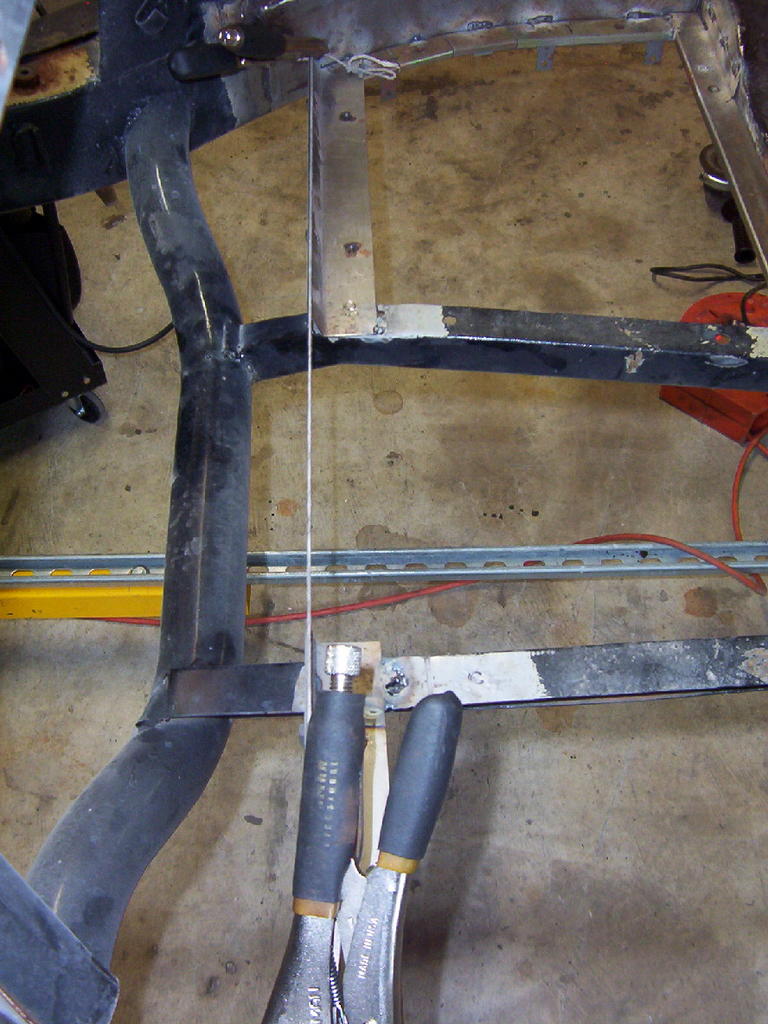
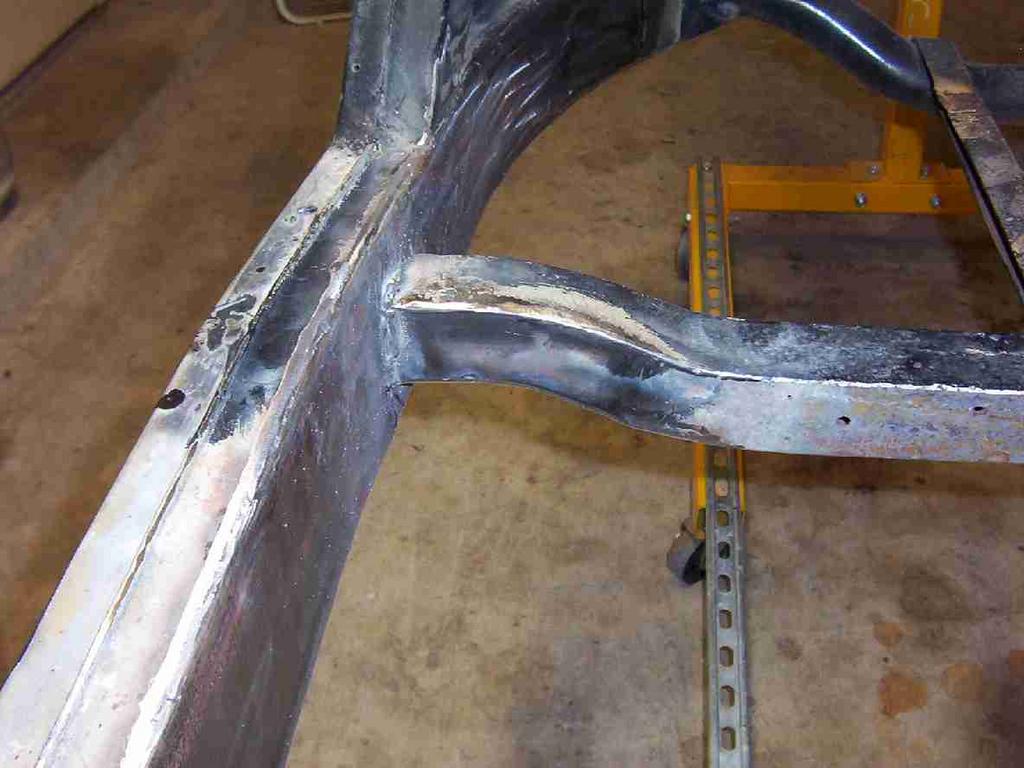
 This shows the repair piece on the left (driver's) side frame rail about 3/4 welded. This was done with flux-cored .040 wire. First, I trimmed the piece to run about 3/16" inside the edge of the frame rail to allow room for the weld bead, then clamped with some C clamps, and tacked about every 2 to 3 inches, working from the center out toward the ends. Then I skipped around and laid down 1" beads. This was a fairly easy process. The main difficulty I had was that the dimming control on my helmet kept turning on its own ,so that finally I couldn't see where I was welding! At first, I thought I was just going blind, no big deal, but finally realized what was going on, and solved it with a piece of masking tape.
A word to the wise about welding protection. The first night I welded in my t-shirt, I got some slight redness on my inner arms.
But the next night, I welded sitting down next to the rotisserie (in a lawnchair) in my t-shirt and SHORTS! I had a nice sunburn on my inner thighs as a result - looked like I had spent the day at the beach and missed a "section" with the old sunblock. Ha! Went away after 3 or 4 days, but I don't weld in shorts anymore. Sorry, no picture of this - I leave it to your imagination.

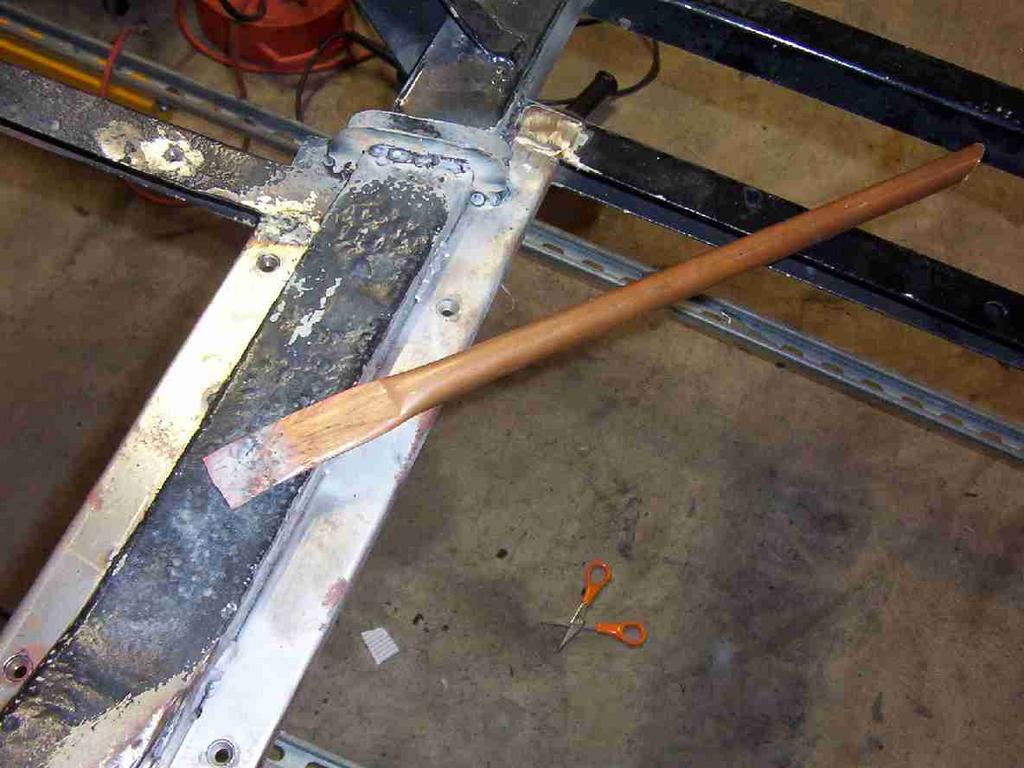
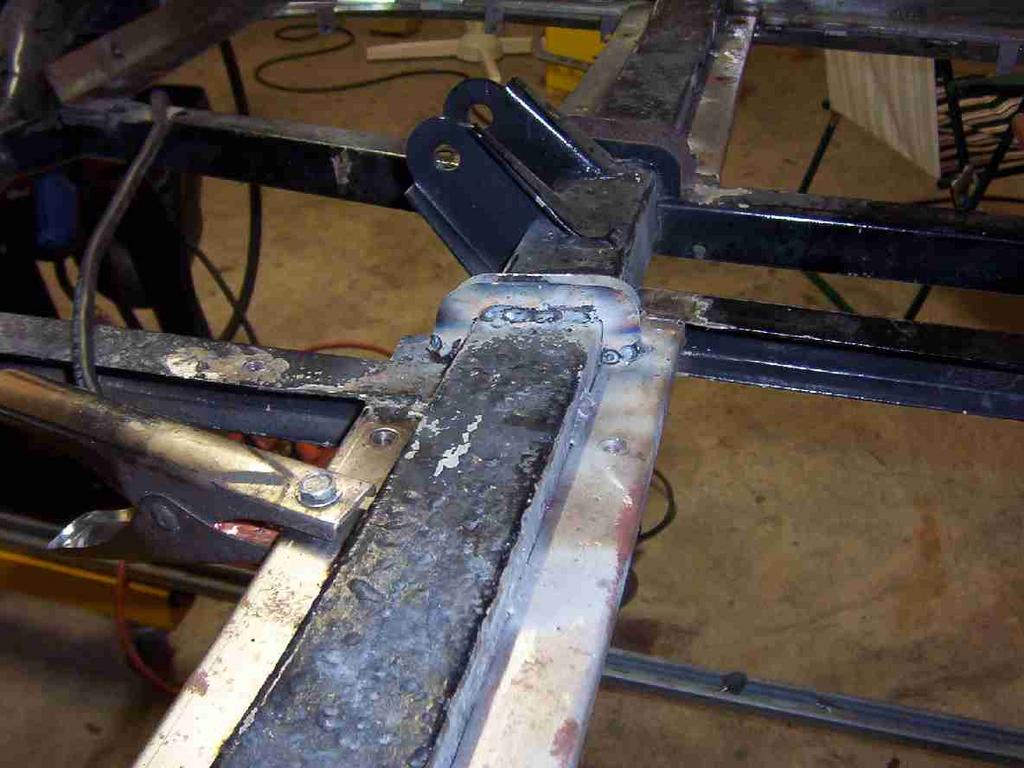
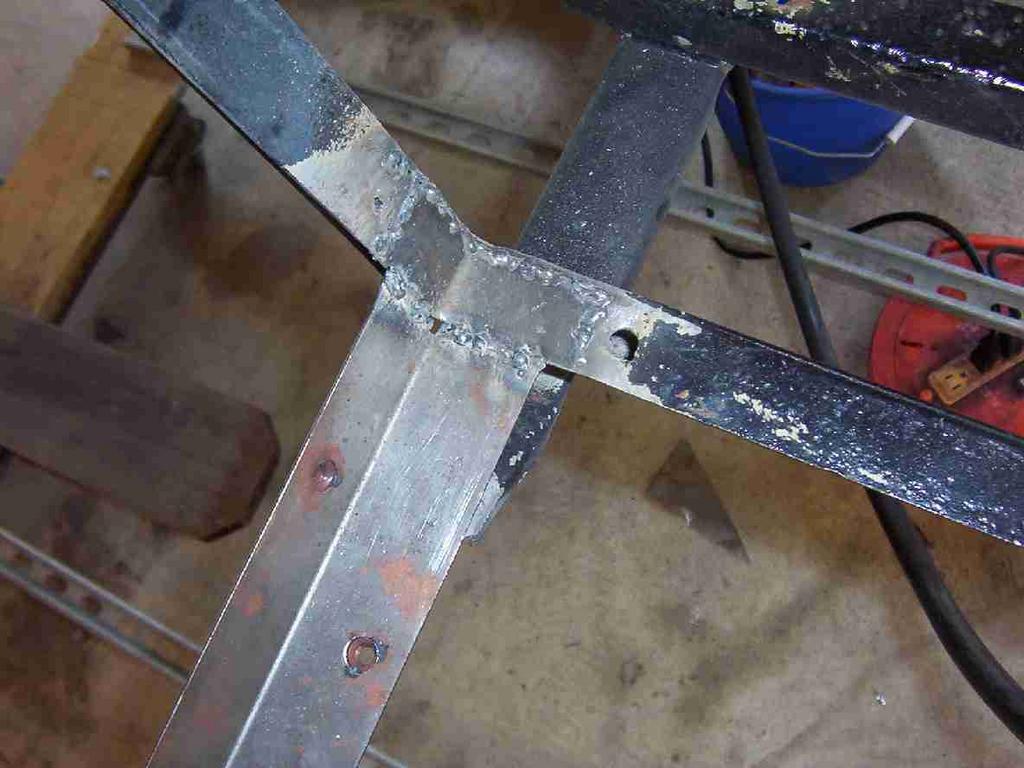
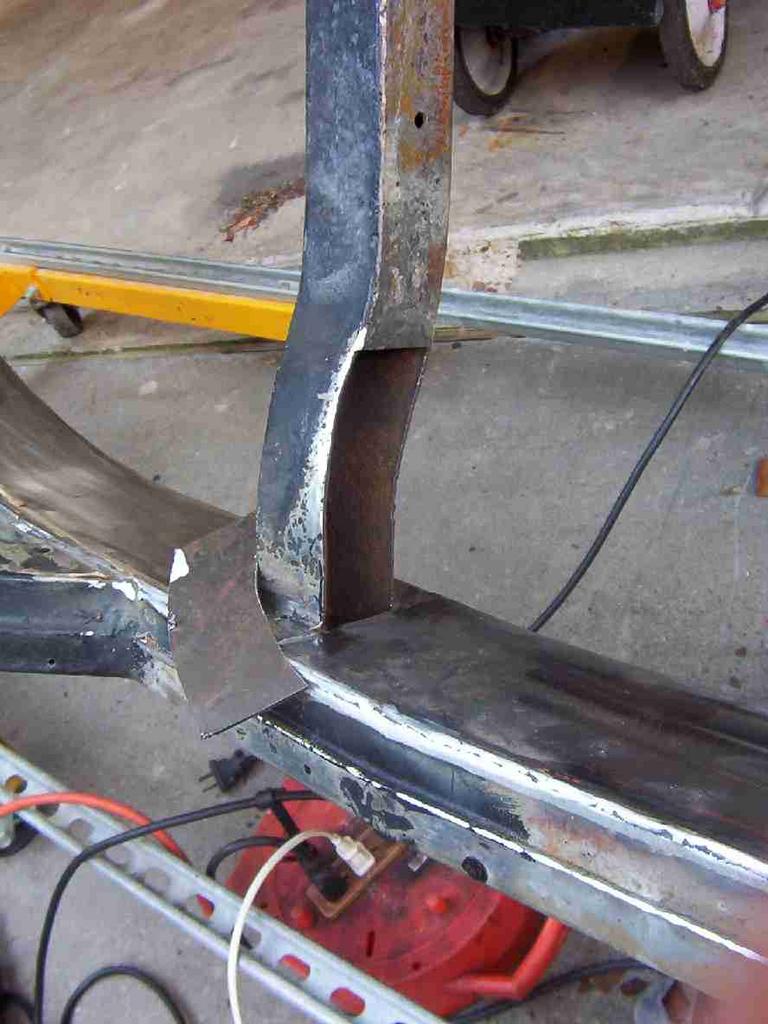
 I have been welding again on the frame in order to finish it up and get on to the body work. There are two brackets at the rear of the cockpit that attach the rear plywood bulkhead, and these were missing on my frame. I couldn't locate a source for these brackets so fabbed them up. Here they are before the welds were ground down.
  I have to build and install the other rack, and do a little more touch-up welding and grinding on previous repairs; then I should be ready to re-mount the body and start the sill repairs.
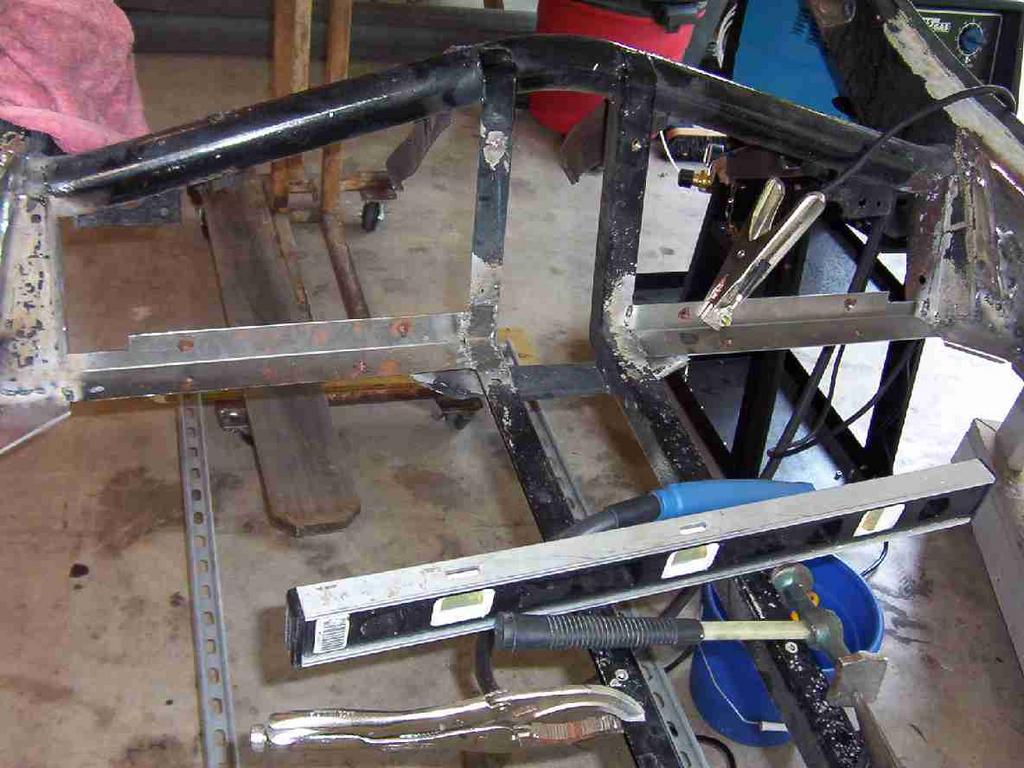
 I have to build and install the other rack, and do a little more touch-up welding and grinding on previous repairs; then I should be ready to re-mount the body and start the sill repairs.


